Let’s Roll!
Painting the Vega on the Cheap
There are two kinds of H-body enthusiasts—regular cheap, and cheap Canadians. This article is dedicated to both
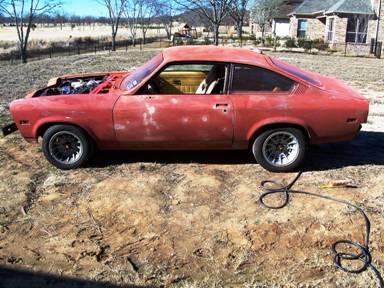
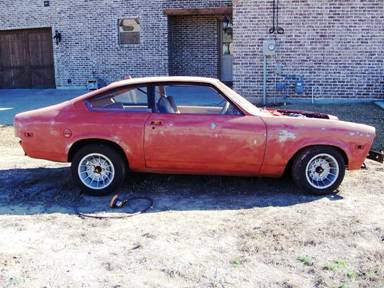
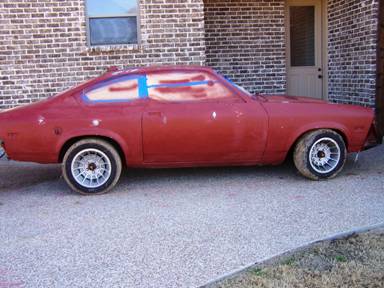
After several years in rattle-can primer, I decided it was time to tackle paint and body on the Turbo Vega. I figured it would cost at least $5000 to have it done professionally by a body shop. When I told my wife, she said “Gee, I guess you’ll be learning to do it yourself!” Well, I figured why not? I’ve done everything else on the car myself or with a little help from my friends. I used to be a pretty good plastic airplane modeler, so I figured some of the filling, sanding, and painting skills should transfer.
After doing some research, I thought the Vega would be a good candidate for a roller paint job. Having read the original writeup by a Canadian Dodge Charger owner on moparts.com, http://board.moparts.org/ubbthreads/showflat.ph...;fpart=1&vc=1 ; plus the article in Hot Rod magazine, http://www.hotrod.com/techarticles/body/hrdp_07...nt_job/index.html ; I thought I could achieve better results with this process than doing a trial-and-error spray job at home. I wanted an orange color, but I knew I would have some areas that would require spraying, so I wanted a Rustoleum product that I could purchase in by the gallon as well as in spray cans. Surprisingly, I couldn’t find many selections in orange that would look good on my car. But I found a specialty product that was the same as their regular rust paint in the outdoor equipment line—Allis Chalmers Orange. Yep—tractor paint! It’s a dead-ringer for Hugger Orange, and almost an exact match for the paint on my 1/24-scale ’74 Vega.
The first thing I worked on was getting my fiberglass cowl hood to fit properly. When I got it, I just mounted it without doing any work on it. Now I needed to cut back the edges to fit between the fenders as well as fix the crunched part on the front tip. I got an 18” in-line air sander from Harbor Freight Tool and some 80-grit sandpaper strips to ensure a straight cut without tearing up the hood. I used tape to mark a straight line, and sanded back to the edge of the tape on each edge, then did a test fit. After repeating this process about five times, I finally had the hood fitting close to factory specs. I cut the front edges back about ¼ inch until the damaged tip was sanded out.
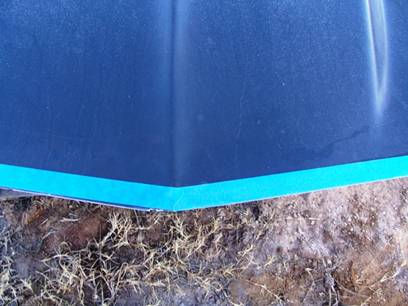
Crunched up nose on hood, guide tape applied
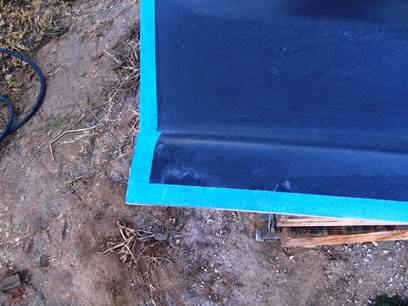
Sanded back to guide tape
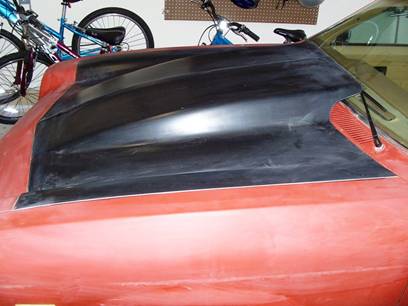
Hood fitted on car 1
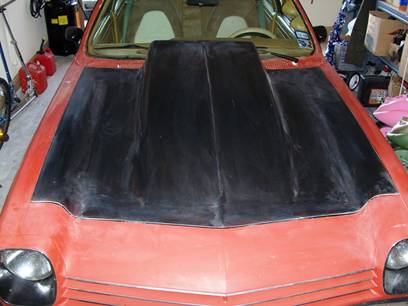
Hood fitted on car 2
But before I started to paint, there were some dings and scratches that needed to be filled and smoothed. The car had some light hail damage on the roof. I found a kit at Harbor Freight Tool that used hot glue sticks and a t-bar type puller to pull the dents. Since it was cheap, I figured I had nothing to lose, but I really didn’t expect to have much success. Well, I was pleasantly surprised. The kit pulled several of the dents out completely, and reduced some of the deeper ones. So now it was time to apply filler. After doing a lot of reading on the subject, I was overwhelmed by the variety of products, all of which did something similar. I decided the best thing to do was to go to a body shop supply store and ask what I needed to buy to do the job. The owner of the shop looked the car over and said that she didn’t think the car needed much filling at all. She recommended spraying the entire car in an epoxy primer that would flow out and cover the remaining dings and scratches. While I didn’t plan on spraying the car, I had to admit that spraying epoxy primer had a lot more appeal than filling and sanding every scratch and dent on the car. Plus, I figured that the primer coat was not as critical as the final color coat and that I could sand out any mistakes before painting.
So I developed a work plan for the project:
1. Remove all trim and plastic pieces—grill, headlight buckets, front lower valence, rear spoiler, badges, door handles and locks.
2. Wash car and wipe down with wax and grease remover
3. Sand car with dual action orbital air sander and linear air sander—80 grit where necessary to sand out surface rust, 320 grit everywhere else
4. Fill any large dents or rust patches and sand smooth.
5. Remove front header panel, fenders, hood and doors
6. Sand and paint cowl, door jambs, threshold and inside hatch with Rustoleum spray.
7. Re-assemble front fenders, hood, doors, header panel.
8. Spray epoxy primer on bumpers, valence, headlight buckets, hood, and spoiler.
9. Spray small, irregular pieces that will be difficult to roll with Rustoleum spray—headlight buckets, lower valence, rear spoiler.
10. Mask main body.
11. Spray main body with epoxy primer.
12. Apply 50/50 paint/mineral spirits to large body panels and main body—roll two coats, wet sand with 600 grit sandpaper, apply two coats, wet sand with 800 grit sandpaper.
13. Apply final two coats 50/50 paint/mineral spirits, wet sand with 1000 grit sandpaper.
14. Reassemble bumpers, headlight buckets, grill, lower valence and spoiler. Touch up as required.
The first thing I attempted was spray painting the cowl with Rustoleum. I though that the spray would be able to get to places that the roller couldn’t reach and provide more even coverage. I was also not worried about getting a smooth coat since most of the time the cowl area looked pretty rough from the factory. I tried applying three thin coats, but the paint settled in the low areas and got thicker in certain places. Subsequent coats caused the paint to lift or craze. I tried smoothing it out with lacquer thinner, but finally wound up stripping it off on one side. After running out of paint, I decided to try rolling the right side of the cowl with a 50/50 mixture of paint and mineral spirits. This worked much better than I expected, laying down a fairly smooth coat that dried quickly and didn’t bunch up in low spots. I also learned to use a hot air gun to burst any bubbles in the paint and get it to “flash” quickly. I laid down about four coats, wet sanded with 800 grit, and put down a final coat with a roller and foam brush, feathering into the area already sprayed. The cowl area was a perfect place to test the roller technique and figure out what worked and what didn’t. I thought that the hot air gun would be a valuable tool when I started to apply a final coat. Although using spray cans to get paint into tight spots is still a good technique, they must be used carefully—a thin coat should be applied, then a second coat applied before within an hour before the first coat starts to dry. The alternative is to apply the paint with a roller in several thin coats.
Painted Cowl
Sprayed Cowl--note wrinkling
Rolled Cowl-- much smoother (glob is from factory)
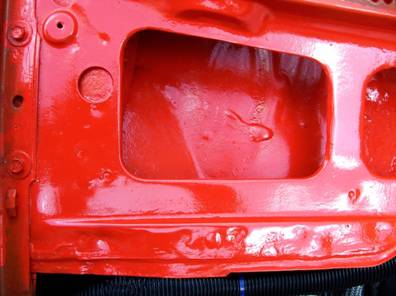
I worked on sanding and filling next. My entire focus here was to get the car straight enough that I could spray it with no more than two coats of epoxy primer and not have much filling to do after it flowed out. I had some light hail damage on the roof, old surface rust, an old antenna hole on the right fender that was filled with POR-15 epoxy putty and a dent on the outer right-hand cowl also filled with epoxy putty. The epoxy had held up well enough over four years that I decided not to remove it, but instead apply POR-15 Straightline filler over it and Bondo glazing putty as required. I also found that the driver’s side door had been repaired previously and some of the dings were actually in the old body filler. The filler was in good shape, so that just required filling the dings with glazing putty and sanding smooth. The antenna hole area still looked too rough even after multiple coats of filler and glazing putty, so I sprayed about four coats of high-build primer on that area and got it smooth enough that all you could feel was a slight ripple. The only major dent in the car was under the right rocker panel in front of the rear wheel arch; probably caused by improper jacking. This area is nearly impossible to see unless you are looking under the car, but I decided to try and make it look better. I did not want to drill and pull this area since the rockers are prone to rust. I used the adhesive stick dent puller, then sanded to bare metal and filled it with two coats of Straightline filler. Since this was really my first attempt at body work, I feel pretty satisfied with the results and hope the epoxy primer takes care of the rest. The dual-action air sander with a 320 grit pad did better than I could do by hand block-sanding, so I relied on it to do the hard work.
Sanded and ready for primer 1
Sanded and ready for primer 2
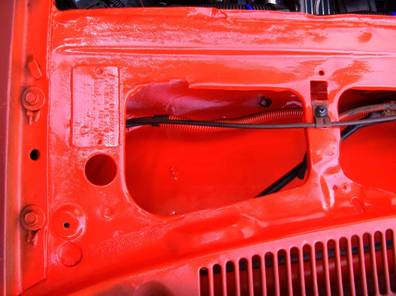
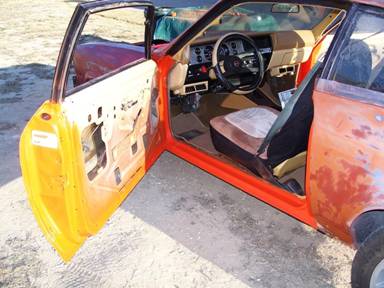
After finishing the cowl area, I decided to remove the doors and fenders and paint the inner doors, door jambs, and exposed areas of the inner fenders with Rustoleum spray. This time I was more careful to get all the coats laid down so the paint would not lift when subsequent coats were applied. Overall I had good results, but still had a couple areas lift. This time I sanded them out, waited until the paint dried, and rolled over them with a 50/50 coat of Rustoleum.
Both door jambs
Drivers Door Jamb
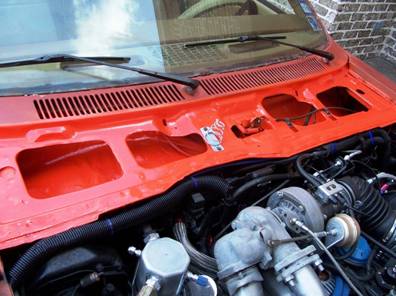
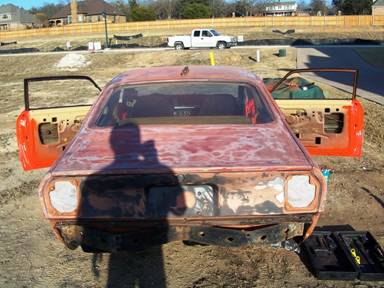
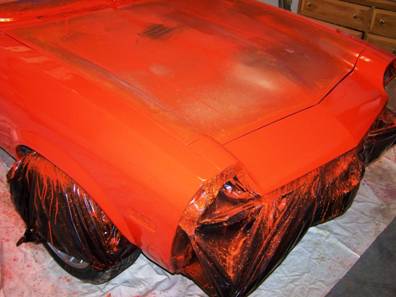
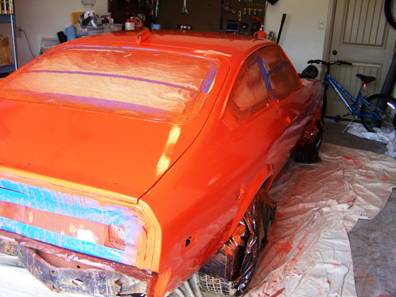
Finally, I did the inside of the rear hatch and hatch seal area. With all this finished, I was ready to start masking for primer. Since I wanted to paint the fiberglass hood separately, I was looking at a huge masking job to keep spray out of the engine bay. But then it hit me—I had an old steel hood that was starting to rust out. It wouldn’t close because of the turbo, but if I cut a hole in the top to allow the turbo to stick out I could use it to seal the engine bay and reduce the amount of masking I needed to do. My trusty Dremel tool worked better than my air cut-off wheel, and in 15 minutes I had my hole. All I had to do was cover the hole with tape and plastic to seal it off before spraying.
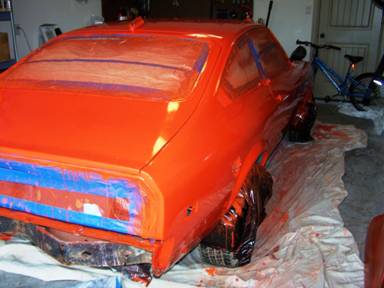
I didn’t want to mess up my garage with spray, so I purchased a 10’ x 20’ temporary shelter with enclosed sides and put it on the vacant lot next door where my air hose could still reach. I waited for a fairly calm-wind day and temperatures above 65 degrees to spray the epoxy primer. I masked the car and applied two coats of DPLP 402 sealer/primer using a High Volume Low Pressure (HVLP) spray gun set for 10 PSI at the gun. I need not have worried about overspray—the HVLP guns put out so little spray that I could have done it in the garage without messing it up. I wore a respirator while spraying to protect from inhaling fumes. Unfortunately, the primer/sealer developed a lot of runs and sags, and the second coat went on sort of grainy. It did not fill in over body work as well as I expected, so I had to apply Evercoat Metal Glaze over the sealer and then wet sand the entire car with 320 grit to get the surface smooth and get the runs and sags out.
Epoxy Primer Applied
Epoxy Primer Applied 2
DPLF is not easily sandable, but since I was not planning to spray sandable primer like K-38 on top, I kept working with wet-sanding until I had a good surface for the Rustoleum. DPLF also has a 7-day recoat window, and needs to be sanded if you are going to top-coat after that, so it was good insurance before applying my first coat.
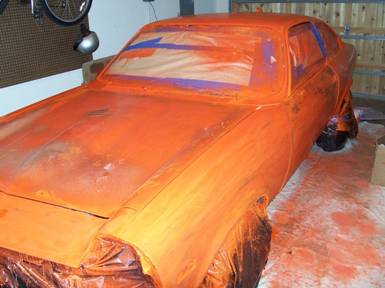
I originally though a 50/50 ratio of paint to mineral spirits would work, but I wanted to get a thick base coat down since I was going to be wet-sanding with progressively finer paper. I thinned the paint 60/40 and started rolling. Everything I had read led me to believe that any bubbles would eventually pop and any runs would just flow out, so I wasn’t too concerned with them as long as I got complete coverage. Big mistake! The paint dried with bubbles still in the paint and showed even more runs than the primer. So it was back to wet-sanding with 320 grit until I got all the runs, sags, and bubbles out. This was probably a lucky mistake, because it acted like a guide coat and I was able to get everything smoother after a second wet-sanding.
First Attempt at Rolling Paint
First Attempt at Rolling Paint 2
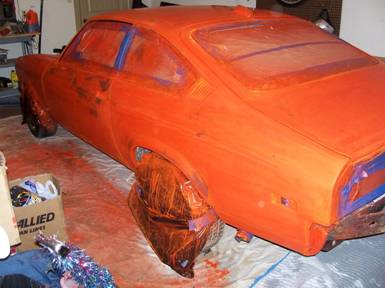
But it was obvious I had a problem. I was ready to give up and spray the paint on after seeing how little mess the HVLP gun made. So after sanding, then wiping the car down with damp cloths, wax and grease remover, and mineral spirits in that order, I re-masked and tried spraying in the garage with another 60/40 paint mix. I got fewer bubbles this time, but pretty much the same results as far as runs and sags. At this point, I knew I didn’t want to sand everything down again after it dried, so I quickly grabbed a fresh paint roller and tray, poured a little bit of mineral spirits into it and tried rolling out the runs before they had time to set up. Breakthrough! I kept working it until I got a smooth, run-free finish. All the information I read said you couldn’t work the paint after about ten minutes from when it was first rolled on. NOT TRUE! If you keep a tray of mineral spirits handy, you can work for about an hour after the initial application and should be able to roll out any imperfections. The paint will get more tacky over time, and it will look like it’s grainy from the texture of the roller toward the end of the process. That’s when it’s time to stop—in a couple minutes the grainy texture settles down and becomes smooth. If you continue much longer, the paint will start lifting underneath and get gummy in spots. I reached this point on the left door and quarter panel, and had to let it dry and sand it out prior to the next coat.

Sprayed-on coat
Sprayed-on coat 2
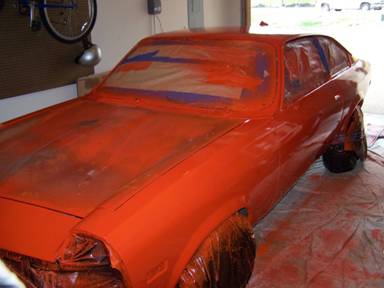
So now it was time to wet-sand with 600 grit. I paid extra attention to the areas that had gummed up on the left quarter and door. There were a few small areas that also needed extra sanding but otherwise rest of the car looked pretty good without many runs and with a fairly even coat. After wet-sanding the car looked pretty rough, but it matched the pictures and descriptions of how it should look at this point.
Two Coats Wet-Sanded
Two Coats Wet-Sanded 2
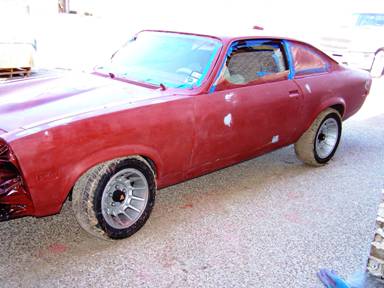
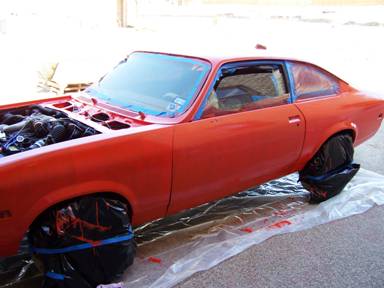
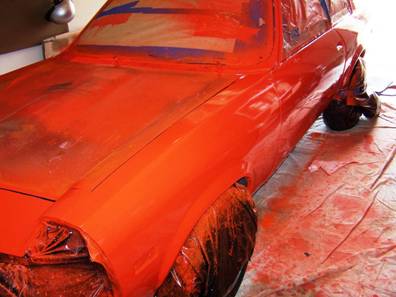
After sitting overnight and another wipe-down, I prepared to roll on two coats. My experience told me two things—first, my paint was too thin. This time I mixed about 75/25 paint-to-thinner. Second, I would roll all the bubbles and sags out until the paint got to a grainy texture. I started using medium roller pressure to apply the paint, then gradually using less pressure to get out the any runs, and finally just using the lightest touch of the roller until all the bubbles flattened out. I started with the roof and then worked counter-clockwise around the car one panel at a time. The paint went on with a lot of very small bubbles everywhere. These can be blown out with air, or rolled out with light pressure. The most difficult area for runs was where the roof transitioned to the quarter panel and paint ran off the rain gutter. After about two hours, I had a smooth, glassy finish that was thin enough to still show primer and body work in some patches. I let it dry for about three hours, and then came back for another session of painting. Again, it matched the descriptions I had read—glossy, shiny, and only a little primer showing through.
Four Coats- After Rolling
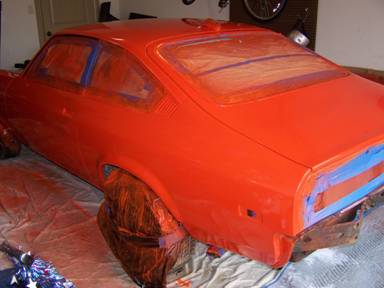
Four Coats- After Rolling 2
Four Coats- After Rolling 3
At this point I concluded that the articles I’ve read on roller painting aren’t specifying enough on roller technique, and that they aren't specific enough on mixture and consistency. Too thin is just as bad as too thick, as I've now learned. Temperature does matter; the paint will get thicker in the tray as well as “flashing” faster at warm temperatures (above 75F), so plan on using a slightly thinner mixture in the summer. After re-reading the Hot Rod Magazine article, it sounds as if they were having the same problems I had on the first two coats well into the third and fourth coats. I think it's because they had it too thin and allowed the paint to flow out rather than continually working it until all the bubbles rolled out. The mixture that seemed to work for me was to pour 4 oz. of mineral spirits into a cup and then add paint through a filter/strainer until reaching the 14 oz. line. Then I stirred the paint mixture and ran it through the filter again into the paint tray. In warmer weather, I could easily add paint to 12 oz, and you could get away with adding paint to16 oz. if you wanted better coverage, but those are good targets to shoot for in your mixture.
I was hopeful that I could stop after four coats, but the coverage was still not good enough in some areas. I moved on to wet-sanding with 800 grit after the fourth coat had dried. Since I was getting good results, I kept rolling coats on using about a 3.5 to 1 mixture of paint to mineral spirits. The process is quite addicting, because each coat lays down better than the previous one and shows more gloss. This was much easier than the last round of sanding because I wasn’t trying to sand out runs and sags as much and was more concerned with sanding out dirt and specks in the paint. Basically, I wet-sanded the entire car by hand (no sanding block) and then ran my hand across the paint to find any rough spots that needed additional attention. Some were visible, and some were not so obvious. When I was happy with the results, I wiped the car down again with a damp rag, followed by wax and grease remover, followed by mineral spirits, and rolled on a fifth coat. I let that dry overnight and rolled on the sixth coat. The finish looked even smoother and glossier by now, but there were still enough areas where you could barely see the primer beneath to convince me that I would need another coat or two.
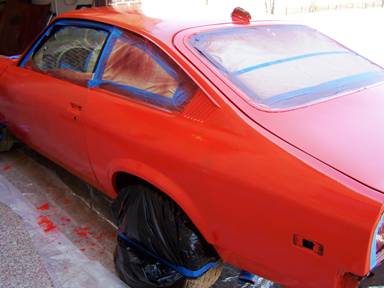
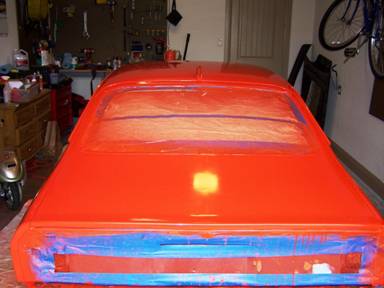
Sixth Coat 1
Sixth Coat 2
Sixth Coat 3
Sixth Coat 4
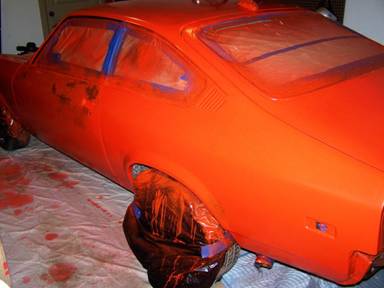
Finally, after eight coats I stopped with the results in the pictures below.
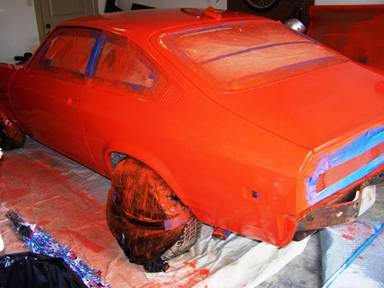
Eighth Coat 1
Eighth Coat 2
Eighth Coat 3
Eighth Coat 4
After the eighth coat I wet-sanded the car down with 1500 grit and moved on to buffing and polishing. I started with a sander/polisher with a 7” wet wool pad and Meguiar’s Medium Cut Machine Polishing compound. Then I followed with the same compound on a sponge pad and removed the polish with a clean terry cloth. That gave the car an even dull shine. But I did have a little burn though on the inside edge of the left front fender, so I started using thin blue tape on the edges of the remaining panels and then following up by hand-polishing with Turtle Wax Polishing Compound Paste on the edges. The next pass was with Meguiar’s Light Cut Polishing Compound by hand with a wet pad and a clean terry cloth. Finally, I used a dual-action rotary buffer with Meguiar’s Machine Glaze on a wet terry pad followed by clean terry cloth which brought the car to a glossy shine in which you could see your reflection.
Polished and Buffed 1
Polished and Buffed 2
Polished and Buffed 3
Polished and Buffed 4
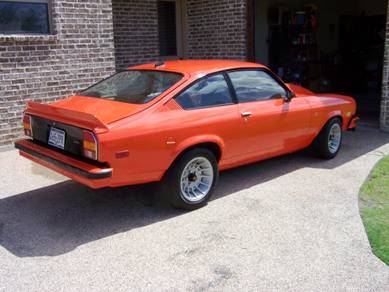
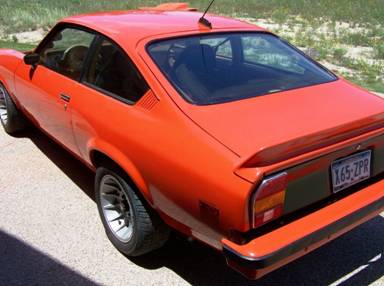
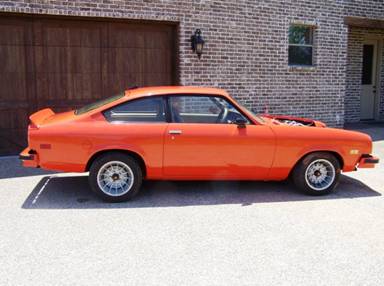
After Race Day 1

After Race Day 2
After the whole car was polished and buffed, I
went back and touched up inside the door jambs and along inside and outside
edges that were slightly burned through. You can do this by carefully dabbing
a mixture of paint along the burned-through area with the tip of a foam brush,
then after it dries slightly feather the edge of the paint with 1500 grit
sandpaper, and follow-up with Turtle Wax Polishing Compound paste by hand over
the re-painted area. It will blend so closely that it will be hard to tell the
area was retouched. If you aren’t happy, simply re-roll the panel and repeat
the wet-sanding, polishing and buffing process until you are satisfied.
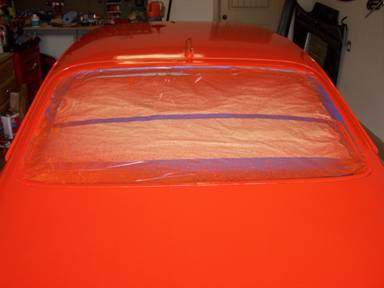
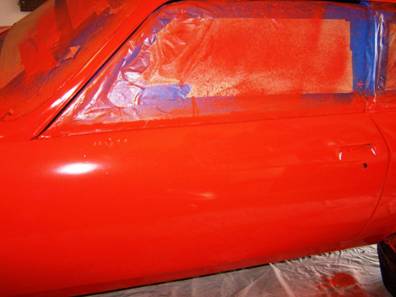
Finally, I re-sprayed the trim around the rear window; rear quarter windows, inside the upper door jambs, and around inside and outside of the door window frames with Rustoleum Black Semi-Gloss spray. I also re-sprayed the taillight panel black at that time. The windshield reveal molding will be replaced later—I cracked the old windshield trying to replace the trim retaining clips, so that will be replaced and black reveal molding will be re-installed.
Here’s a quick summary of my lessons learned:
1. Spend as much time smoothing out all the dings in the car as you can. Even though I thought I had eliminated most of them before and after spraying with epoxy primer, I found a lot of areas I wish I had spent more time with after the glossy paint was applied.
2. Spraying epoxy primer was totally unnecessary. If I had it to do over again, I would grind down the old paint with a dual action air sander using 320 grit until smooth. Then I would fill as necessary with body filler, sand, and top with glazing putty. Any remaining low areas or rough patches can then be coated with a high-build primer from a spray can
3. Mixture is critical to success. I recommend using a graduated mixing cup, filling to the 4 oz. line with mineral spirits, then adding paint through a strainer up to about 14 oz (+/- 2 oz depending on temperature). In warmer weather (above 80 degrees F) the mineral spirits will evaporate faster and the paint will “flash” and become unworkable sooner. To compensate for this, use a higher ratio of paint to mineral spirits.
4. Start rolling with enough pressure to get complete paint coverage on the panel, the go back over with decreasing pressure until you get an even coat with no lines, no runs, and no bubbles.
5. My work plan was to wet-sand in the morning, wipe the car down with mineral spirits, and then roll on a coat of paint. This took approximately 2 ½ hours if everything went well. Then I would let the paint dry overnight and roll on a fresh coat the following morning. I would let that dry overnight, and then repeat the process. You can apply a fresh coat immediately after wet-sanding and then wiping the surface down with a tack rag dampened with mineral spirits, but let each coat dry at least eight hours before applying another coat or attempting to wet-sand.
6. This process is very forgiving. If you screw up, just wet-sand the panel and roll on another coat. It’s also addicting, because each coat looks better than the last. Knowing when to stop is as important as knowing when to roll on additional coats.
7. Do not allow any drips of paint to dry on a finished panel! It’s very difficult to sand it off and blend it without repainting the whole panel. Immediately wipe any fresh drips off with a rag dampened with mineral spirits. The finished paint will not come off with mineral spirits after it is dry. Mineral spirits will leave the surface dull, so you will need to buff and polish to restore the shine. If you need to strip a panel after it is dried, use straight lacquer thinner and the paint will come right off.
8. You can blend in any burned-though areas with the standard mixture of paint and a foam brush followed by carefully feathering with 1000-2000 grit sandpaper and then polishing with white compound.
The process is time-consuming and labor-intensive, but it’s easy and cheap if you aren’t experienced with spraying. I liked the fact that I had fewer variables to deal with, hence less chance to screw up, and even if I did it was easy to recover. I liked the results and would do it again on a car where I didn’t care about a show-quality finish. So if you want to go cheap and easy, try roller-paining your next project!