H-Body A/C Made Easy
by
Dave English
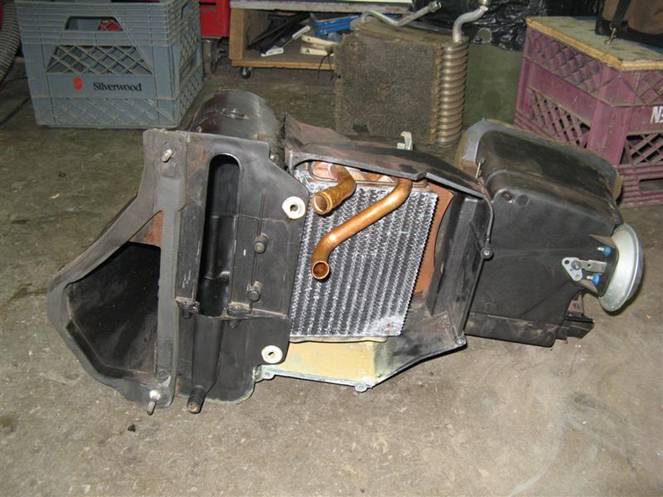
After two sweltering Texas summers in my LT1 Vega, I seriously regretted not building the car with air conditioning. I spent many hours looking at A/C kits from Vintage Air and trying to figure out how to retrofit a system into that car. But even before I sold the car in 2004, I was working on my next Vega project, a ’77 Hatchback that I had already decided would be air conditioned. The problem was that this car came from the factory without A/C. So I started studying h-body factory air systems by looking at how the cars at the local wrecking yard were configured, and by reading the Heating and A/C sections of the ’79 Monza Service Manual. Fortunately, there was a ’78 Sunbird Wagon (same body style as the Vega wagon) at the wrecking yard. Besides taking the condenser, blower case, evaporator and case, A/C lines and control from this car, I was able to create cardboard templates for the cut-outs I would have to perform in the firewall and blower plenum to the ’77 Hatchback.

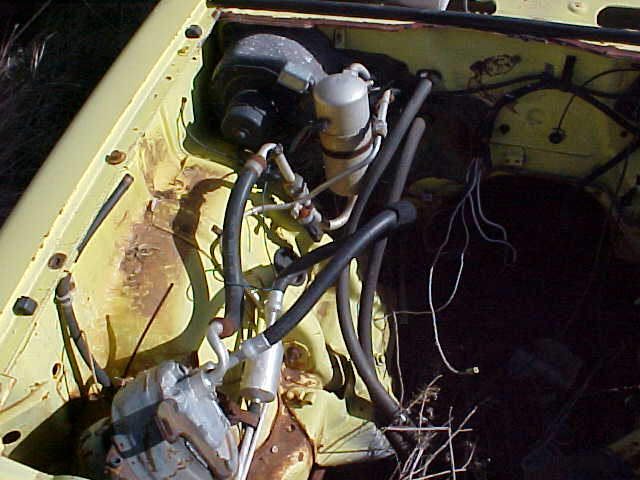
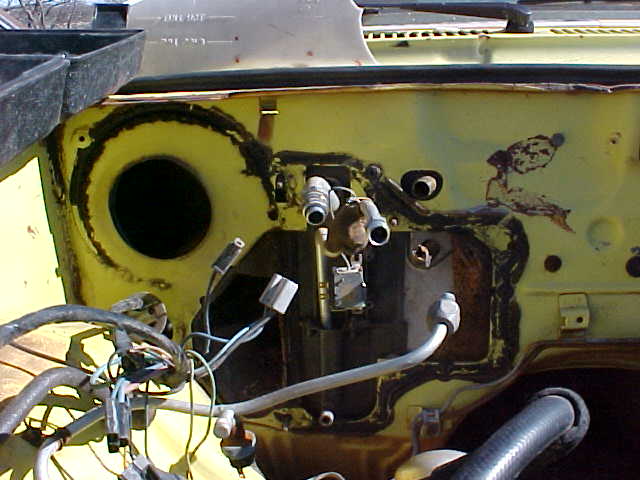
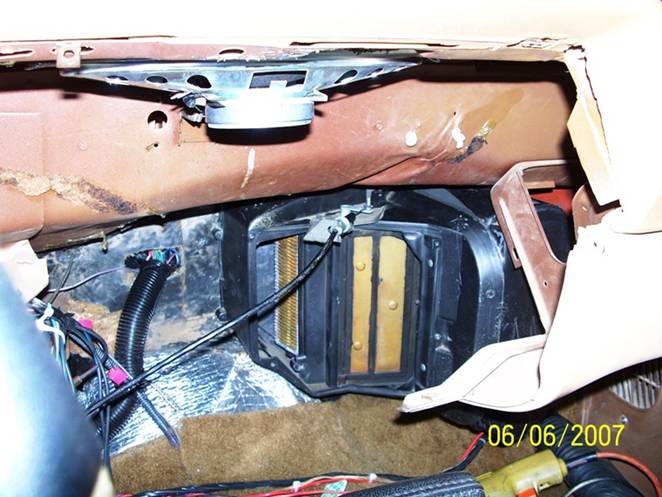
After transferring the outlines of the cardboard templates to the firewall and to the blower plenum inside the car between the firewall and glove compartment, I used a Dremel tool to modify the existing openings for the heater core to match the A/C openings on the Sunbird wagon. This created a much larger opening than I needed for the Heater and A/C case, so I needed to create a cover for the firewall that would only leave the openings I needed for the heater core tubes, evaporator core tubes, and blower inlet. I noticed that earlier Monza-body cars used a cover plate that bolted onto the firewall to accomplish this. Later cars did not use this, but had firewalls specifically cut for A/C. I found a ’77 Sunbird 2+2 in the wrecking yard that had one of these plates and pulled it for my car. It can be seen as the black area on the yellow firewall behind the receiver/drier in the picture below
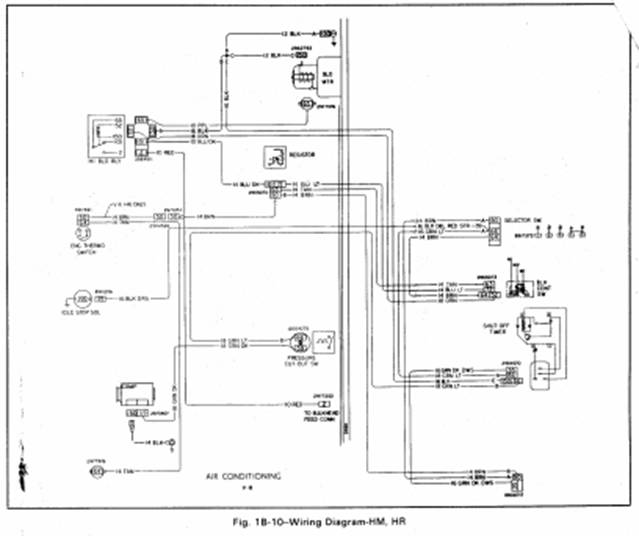
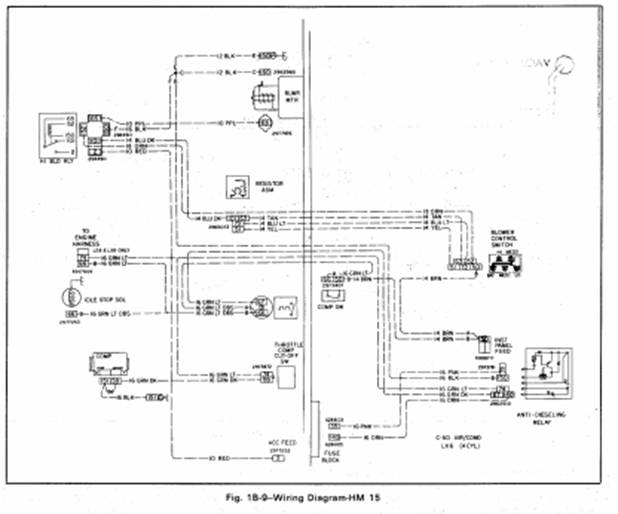
Wiring was another issue. Most H-body cars use a standard wiring harness with a sub-harness that plugs in to provide power to the A/C and blower. My main harness came out of a ’75 Oldsmobile Starfire V-6 with the same dash layout as a Vega GT. The A/C sub-harness came out of the same ’78 Sunbird wagon I used for the other parts.
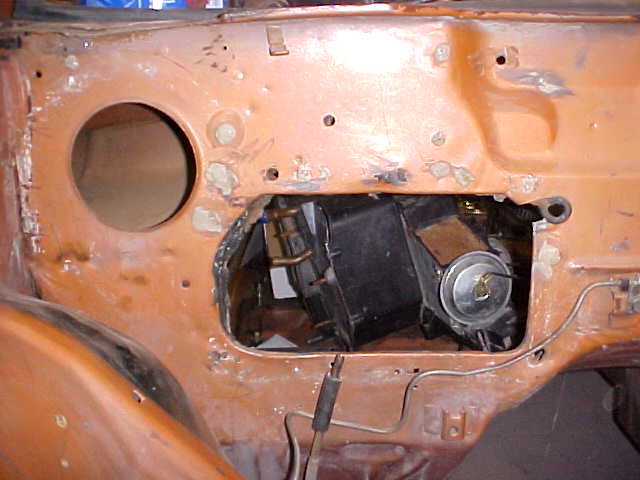
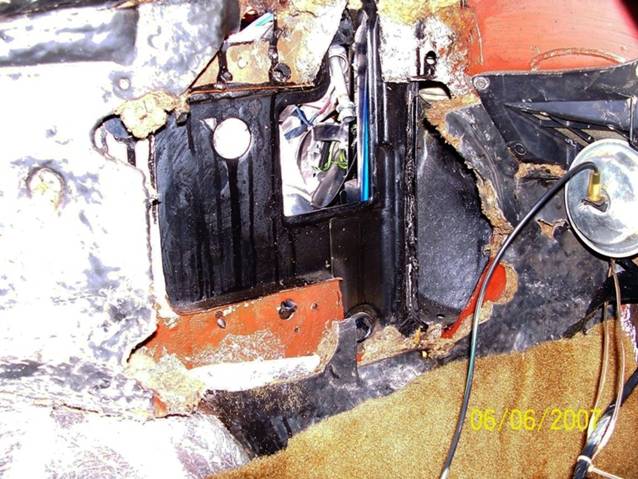
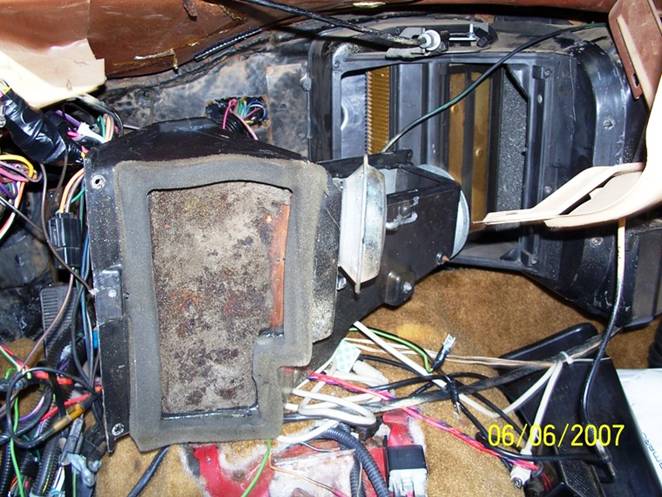
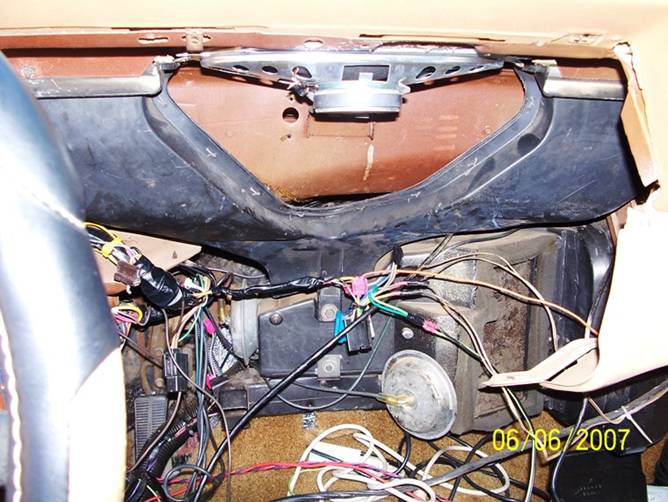
Once the firewall and blower plenum were modified, I mounted the blower case first, then fitted the Heater and A/C core case as an assembly into the opening to match up with the blower case inlet opening. There are five studs on the case assembly that protrude through the firewall. These required minor drilling and grinding to the original holes from the template to get everything to line up correctly. After the Heater and A/C case assembly was in place, I lined up the firewall cover plate over the heater core and evaporator tubes, and mounted it to the firewall using sheet metal bolts.
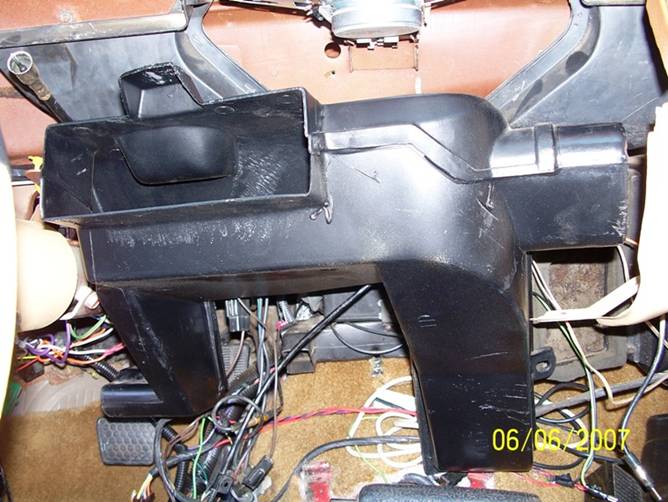
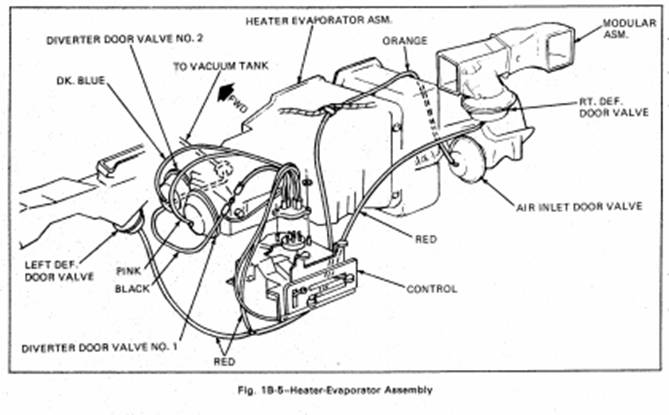
Once the Heater and A/C core case assembly was in place, I was able to add the Diverter Door assembly, the lower heat outlet ducts, defrost ducts, and the Modular Duct Assembly.
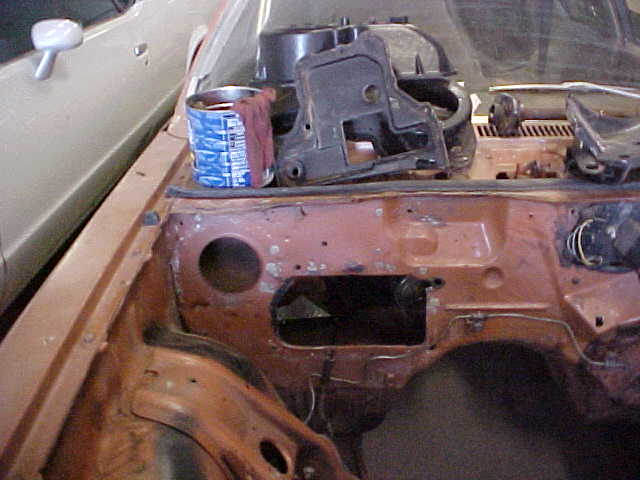
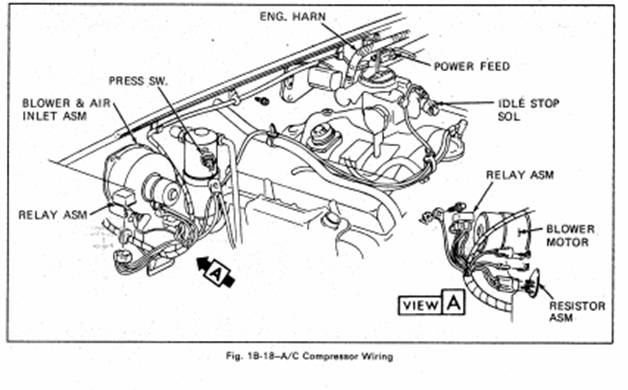
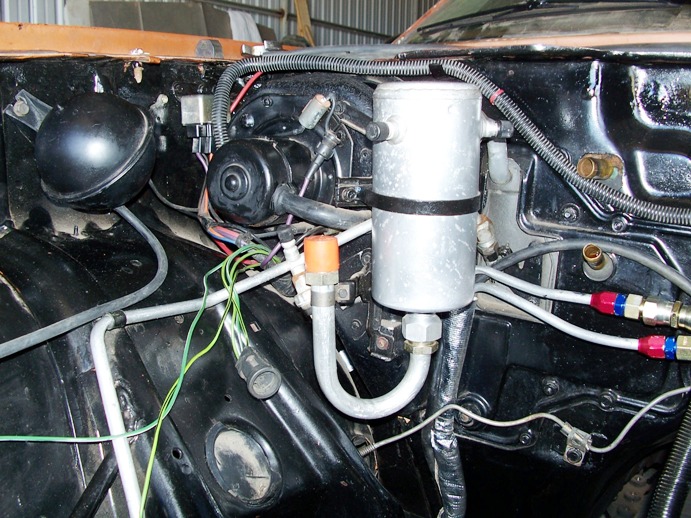
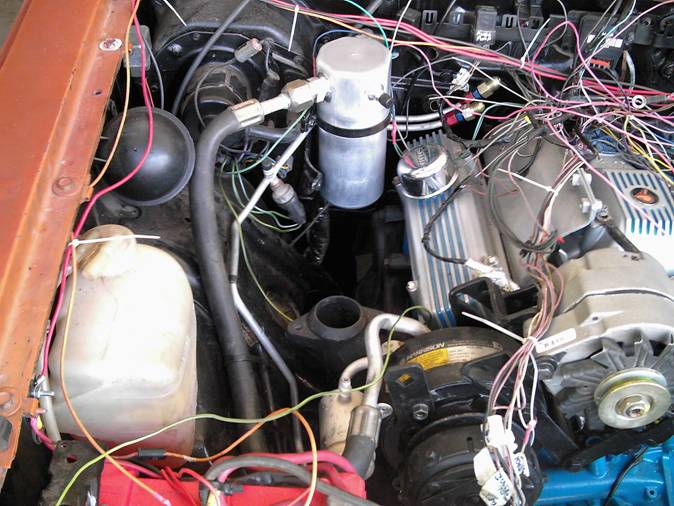
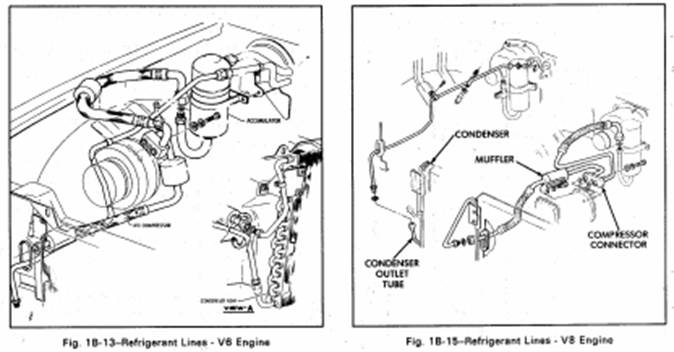
After everything is mounted on the firewall, it’s simply a matter of connecting the A/C lines from the condenser, evaporator, drier, and compressor. I recommend using an accumulator/drier from an S-10 because the inlet and outlet fittings are located near the top of the canister and out of the way of the engine, heads, and manifolds.
With a little planning and the right donor parts from an air conditioned V-6 or V-8 Monza-body car, a factory A/C system can be installed in any H-body, whether it originally came with one or not. Hopefully, these pictures and diagrams will help anyone who wants to tackle this project. I did, and I’m very happy with the result—nothing like a hot car with cool air!